
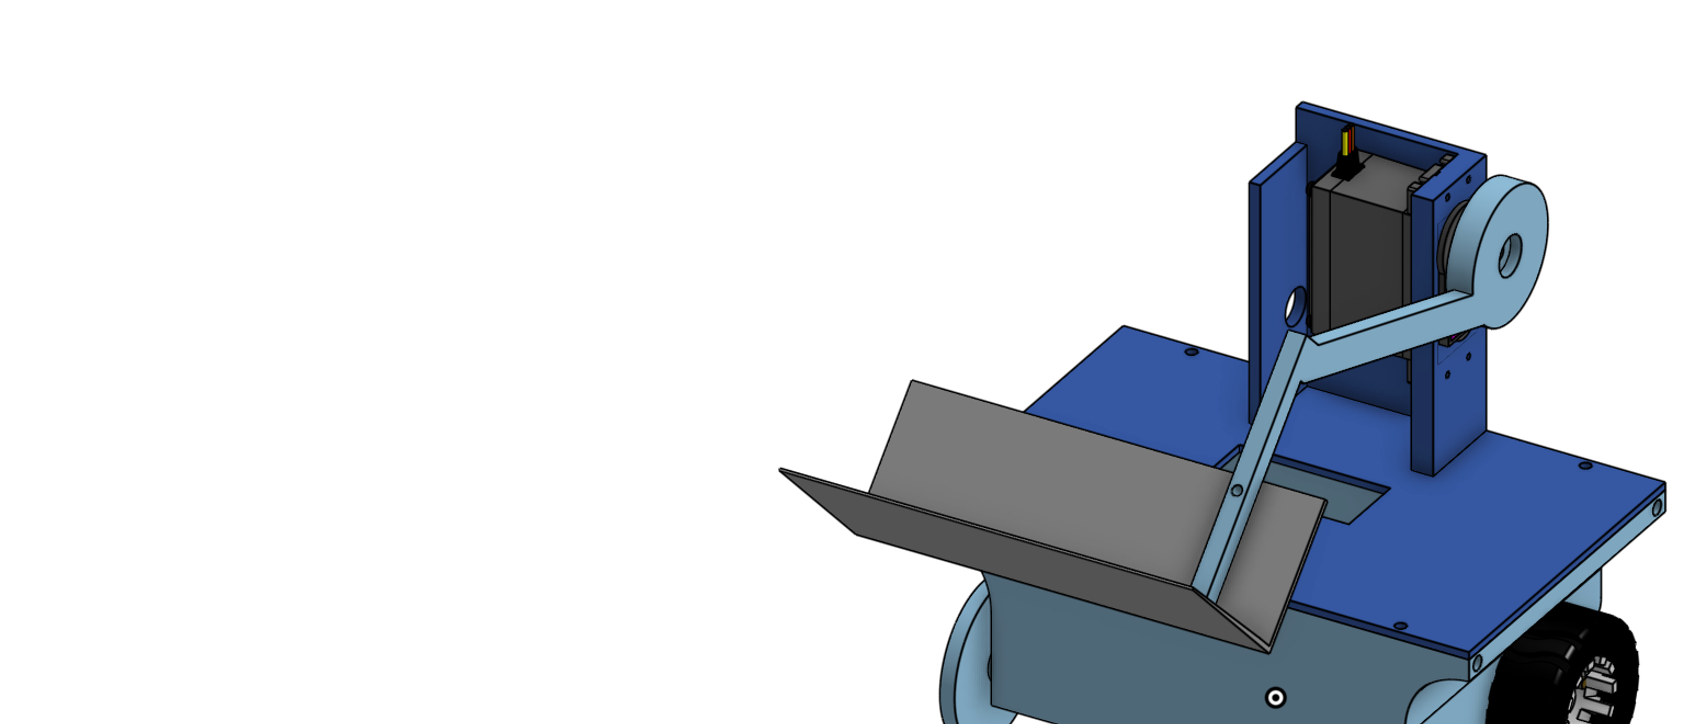
Build the arm on the detached deck. The servo sits in the tower and turns its supplied star-shaped horn; the horn moves a linkage connected to the scoop.
Fit check: The horn-linkage-scoop arrangement is present in the CAD, but its fasteners and usable servo range still need a complete physical build to verify. Match the assembly view and test each joint before tightening it.
1. Center the servo first
Before mounting anything, connect only the servo to S1 and command it to 90° with the sketch from Making a motor move. Disconnect power before installing the horn. Starting at the midpoint leaves room to tune motion in either direction.
2. Mount the servo in the tower
The tower is part of the deck print. Test-fit the MG996R in the orientation shown in the CAD assembly, with its output spline on the linkage side. Fasten it only after the mounting flange sits flat and the screw holes line up.
3. Attach the servo horn
With the servo centered and unpowered, fit the star-shaped horn supplied with the MG996R onto the output spline in the starting orientation shown in the CAD. The horn is a servo accessory, not a printed part. Do not tighten its center screw until the linkage can move a small amount in both directions without reaching a hard stop. The servo's full travel is not the arm's safe travel.
4. Connect the linkage and scoop
Test-fit the scoop at the front of the deck, then connect the arm linkage between the servo horn and scoop as shown in the CAD assembly. Test the matching hardware at each pivot before installing it. Tighten only enough to retain the joint while preserving free rotation.
5. Check the linkage by hand
With the servo unpowered, check the linkage through a small range and stop at the first resistance. Inspect every pivot and clearance; do not force the servo or assume fastener tension is the cause. The first physical build must establish the usable lowered and raised positions.
Leave the deck detached and keep the servo lead accessible. The next page wires and tests the robot before the deck is fastened to the chassis.