
Every robot starts the same way: one motor, spinning on command. This guide is written for the Alfredo NoU3 — the board we recommend and build all our guides around.
What's an Alfredo NoU3? It's an all-in-one brain for your robot: a microcontroller with the motor drivers built right in. You plug in a battery and motors, upload your code, and the board runs it — the same role a VEX Cortex, V5 Brain, or roboRIO plays in those ecosystems. By using the NoU3, you avoid having to solder together motor controllers and other electrical components. You can buy one here.
What you need
- Alfredo NoU3
- An allowed drive motor with leads — this guide uses an N20
- A positional servo — choose one from the allowed motors and servos guide
- A battery (or USB power for now) — see Battery options
- A computer with the Arduino IDE installed
- For driving: a phone or laptop, or an Xbox/Steam controller
1. Set up the Arduino IDE
- Download the Arduino IDE and install it.
- Install the ESP32 board package (Boards Manager → search "esp32" and install esp32 by Espressif Systems) — this is what makes the Alfredo NoU3 show up as a board.
- Open File → New Sketch.
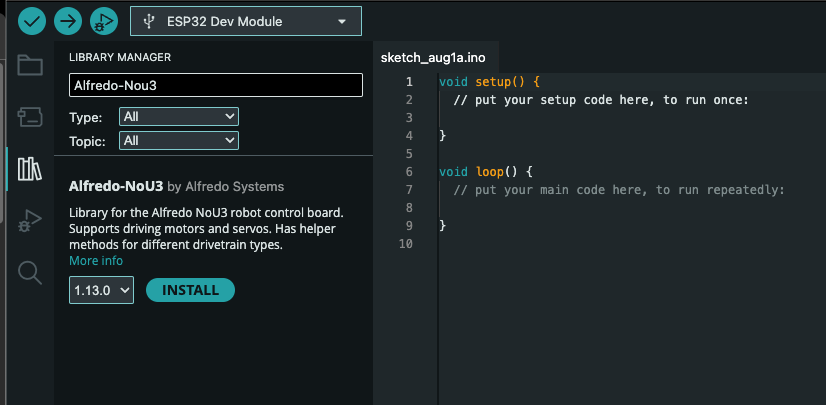
- Open the Library Manager and install Alfredo-NoU3:
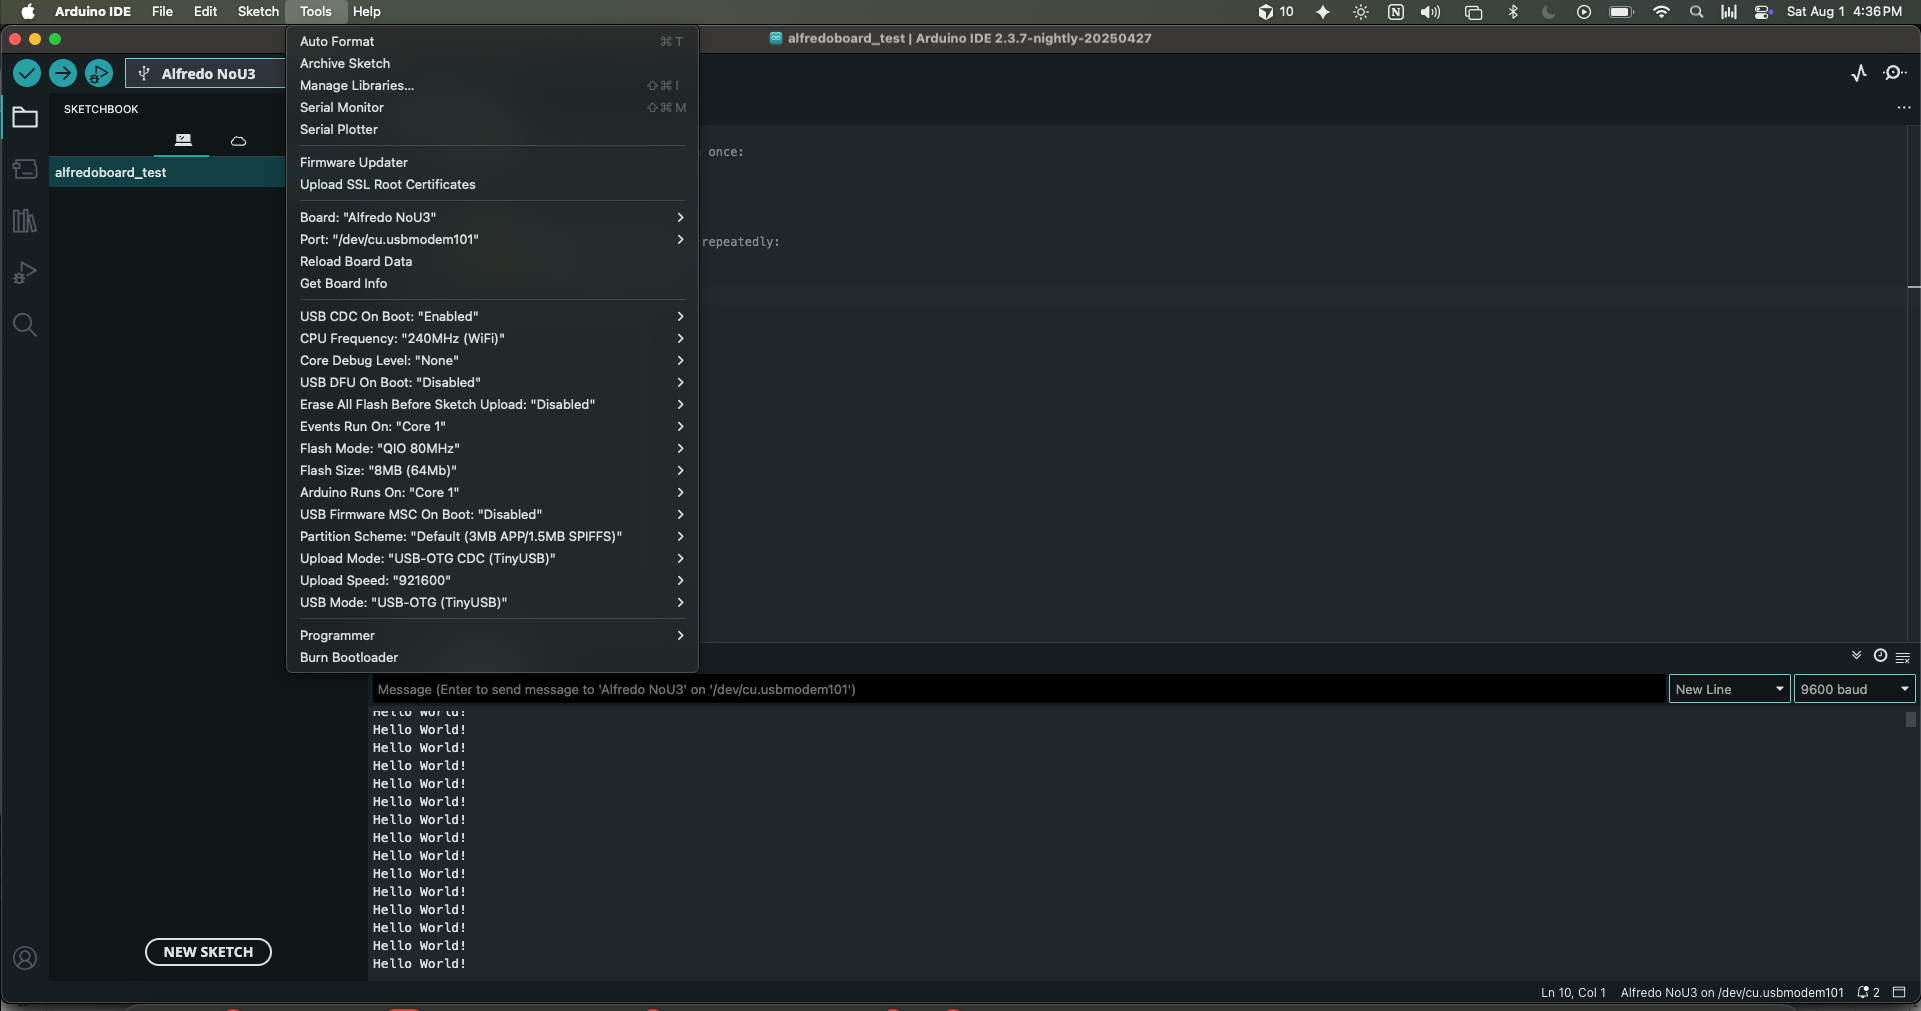
2. Select the board
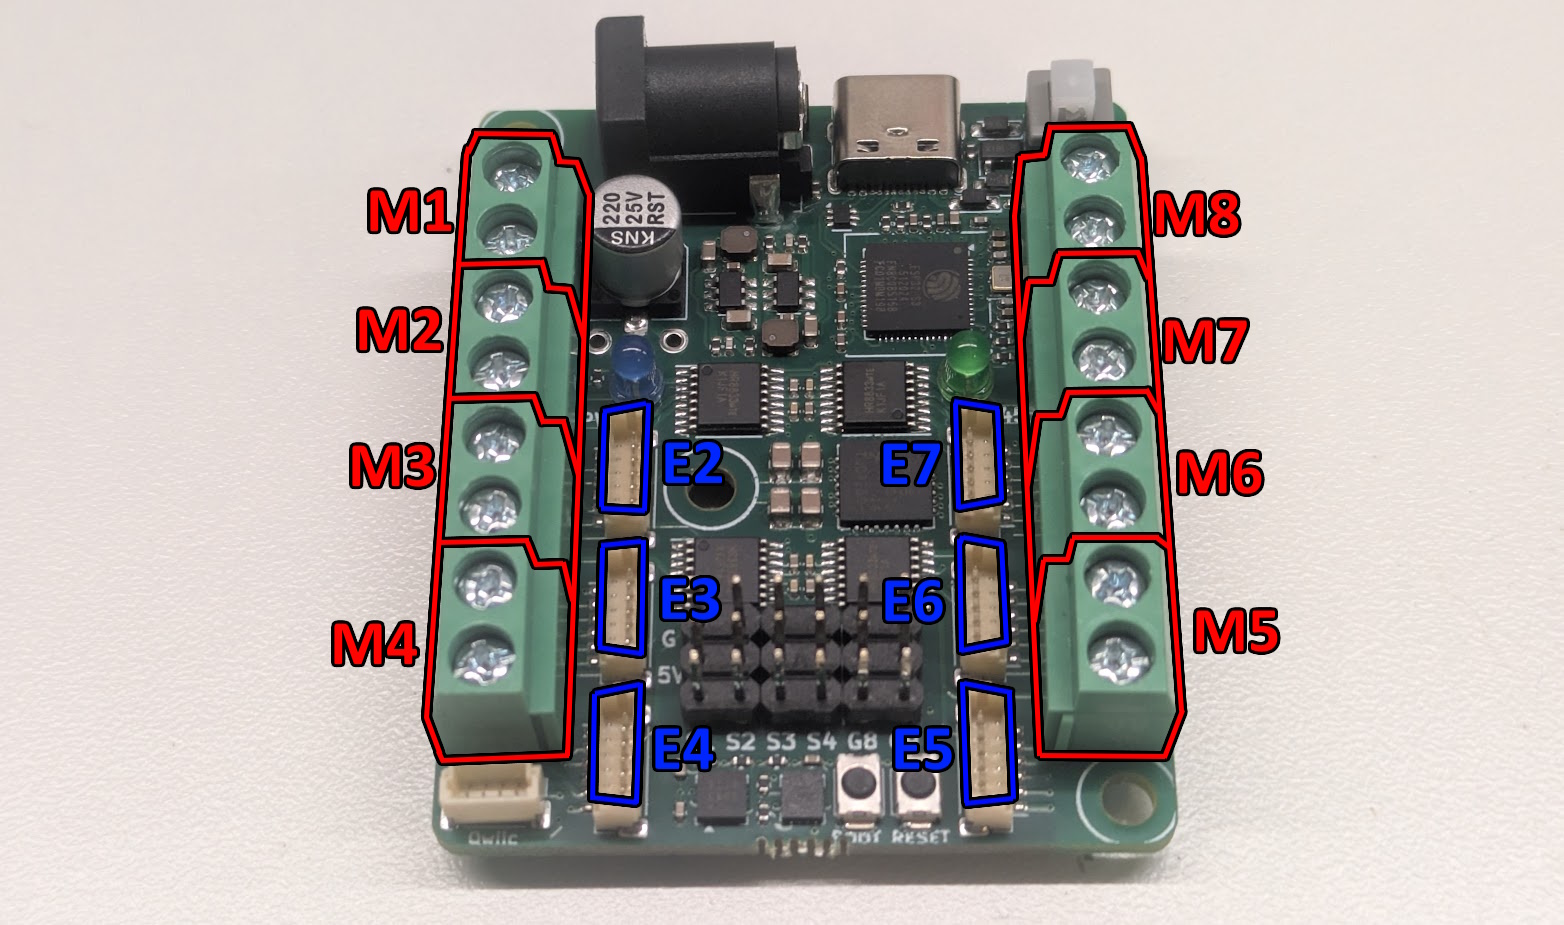
Here's a map of the board — you'll be using the USB-C connector now, and the motor ports in a couple of steps:
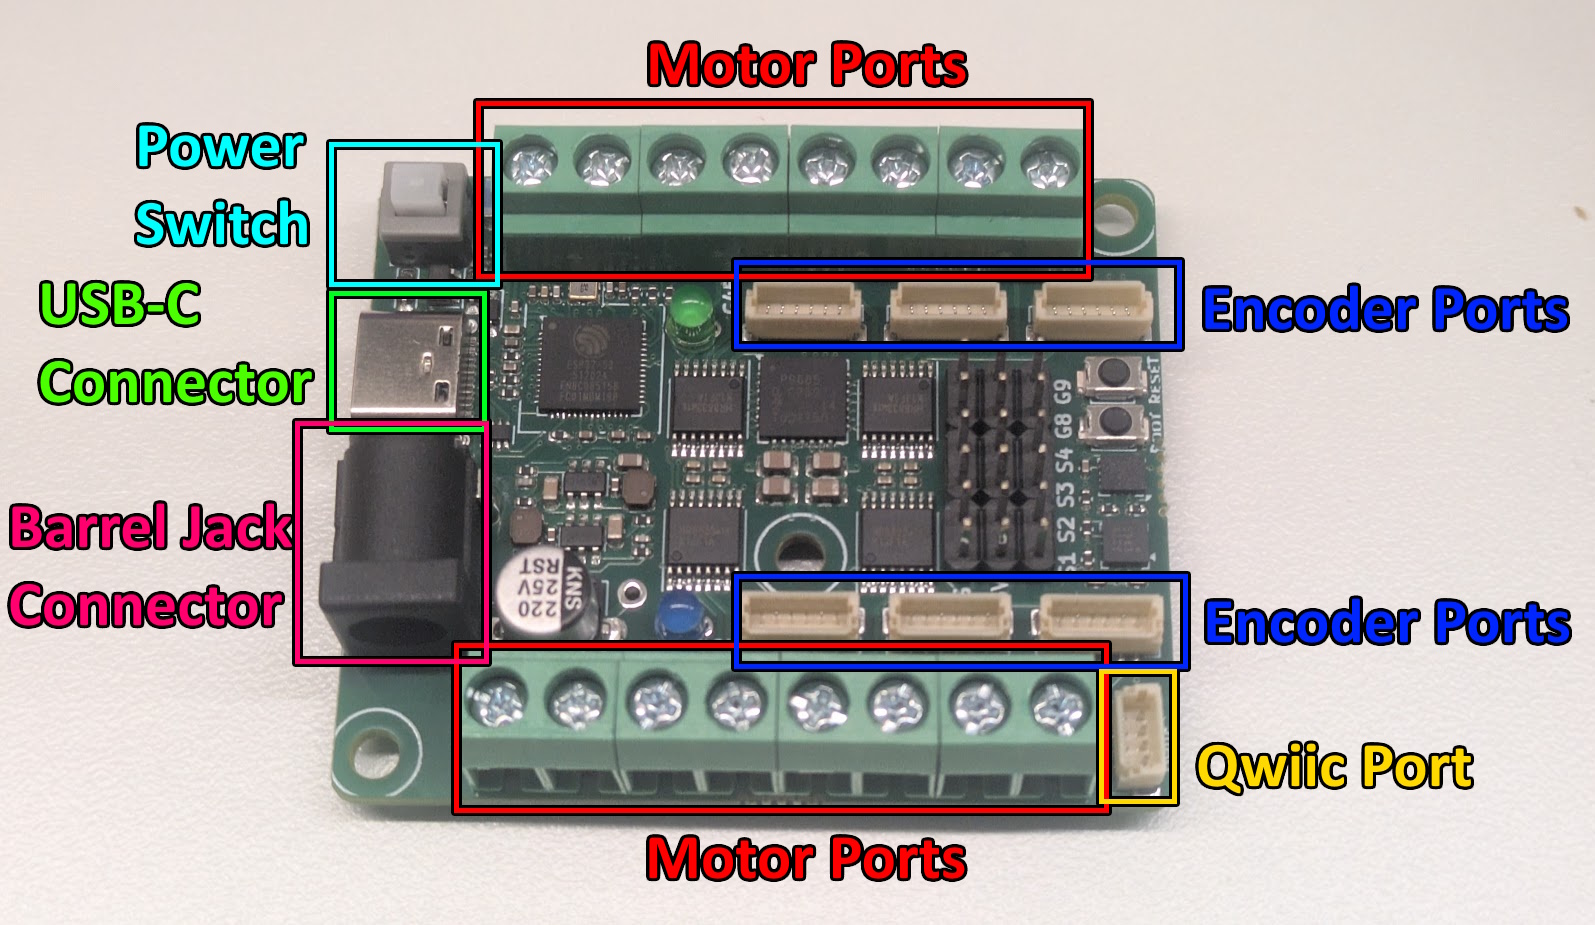
Board diagrams from the Alfredo NoU3 docs.
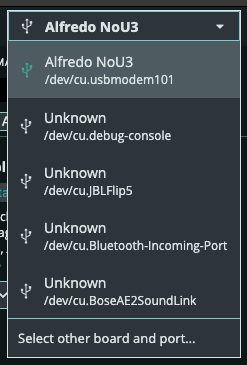
Plug your Alfredo NoU3 into your computer over USB-C, and select it in the dropdown at the top of the window:
3. Check the board is alive
Add one line to the empty sketch so the board prints back to your computer:
void setup() {
  // put your setup code here, to run once:
}

void loop() {
  // put your main code here, to run repeatedly:
  Serial.println("Hello World!");
}
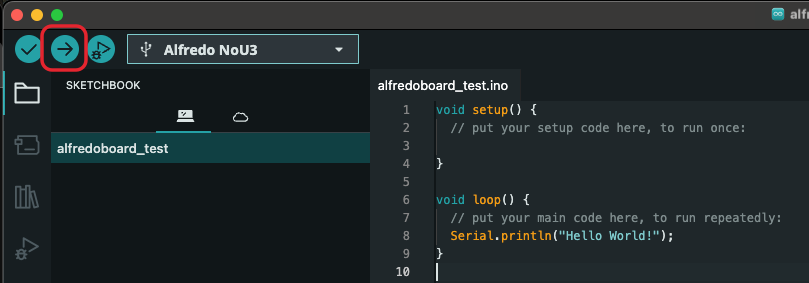
Click Upload — the arrow button boxed in red above — then open
Tools → Serial Monitor and verify you see Hello World! printing over
and over:
4. Move a motor
Let's drive a motor now. Plug a motor into M1 — the top-left pair of screw terminals (M1+/M1-):
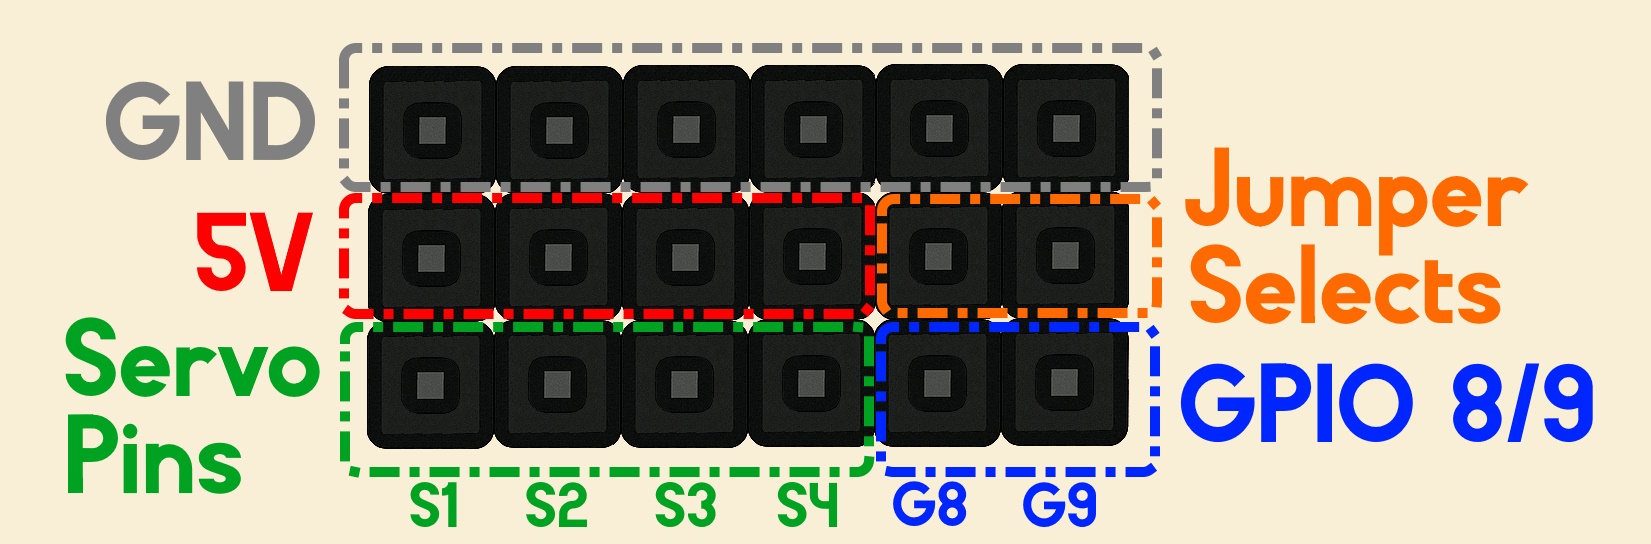
Then plug your servo onto the pin column labeled S1. Match the wires to the rows in this diagram: ground (brown or black) on the GND row, power (red) on 5V, and signal (orange or yellow) on the row marked Servo Pins:
Now upload this sketch:
⚠️ Be careful — with this sketch, the motor moves as long as the board is on!
#include <Alfredo_NoU3.h>

NoU_Motor our_motor(1); // Motor port 1
NoU_Servo our_servo(1); // Servo port 1

void setup() {
  // put your setup code here, to run once:
  NoU3.begin();
}

void loop() {
  // put your main code here, to run repeatedly:
  our_motor.set(1);    // Motor full speed forward
  our_servo.write(90); // Servo to 90 degrees
}
The motor spins at full power and the servo snaps to 90°. Your code is driving real hardware — now let's put you in control.
5. Drive the robot
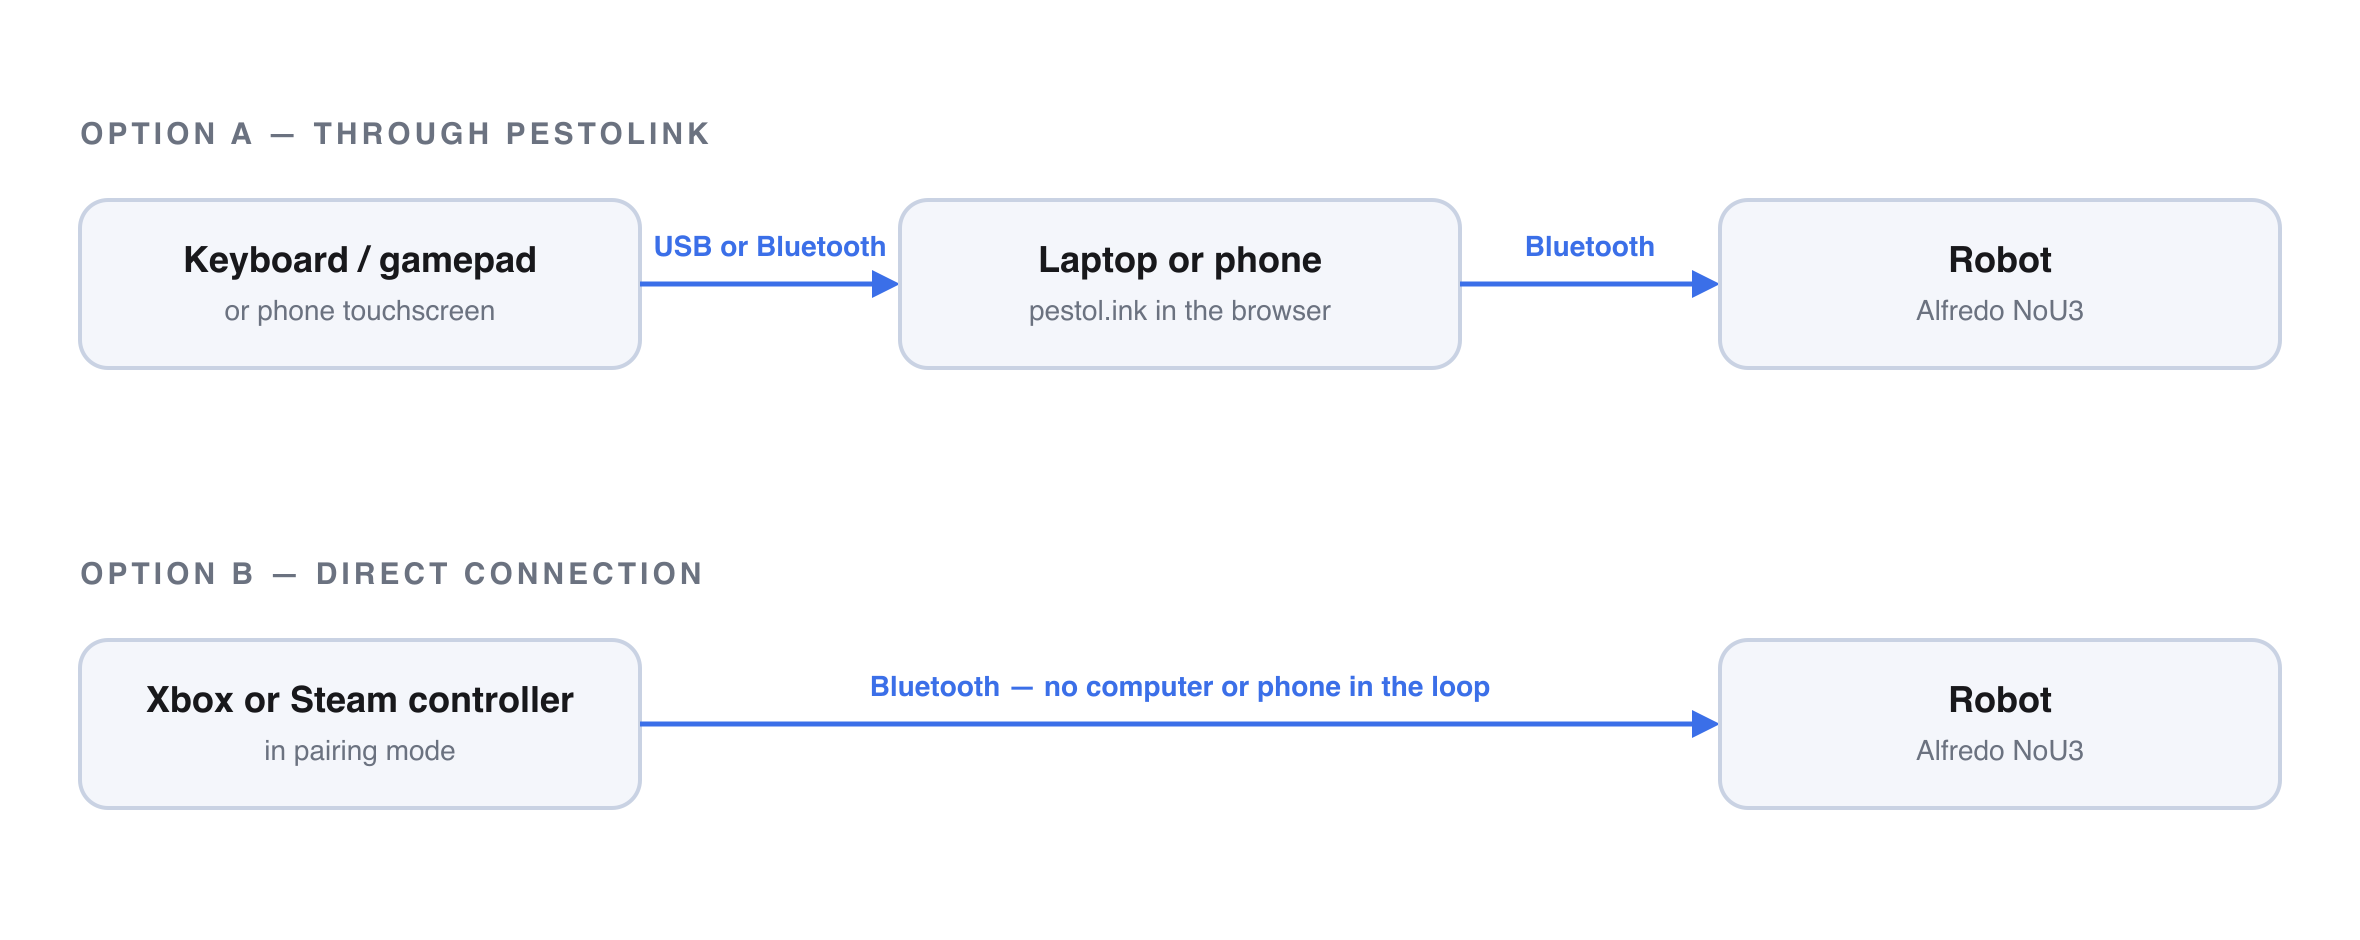
A robot you can't steer is just a motor demo. There are two ways to hook up a controller — pick one:
- Option A — phone or laptop (PestoLink): drive with your keyboard, your phone's touchscreen, or any gamepad that connects to your computer or phone.
- Option B — Xbox or Steam controller, directly: the controller pairs straight to the NoU3 over Bluetooth. No computer or phone in the loop.
Option A: Drive from your phone or laptop
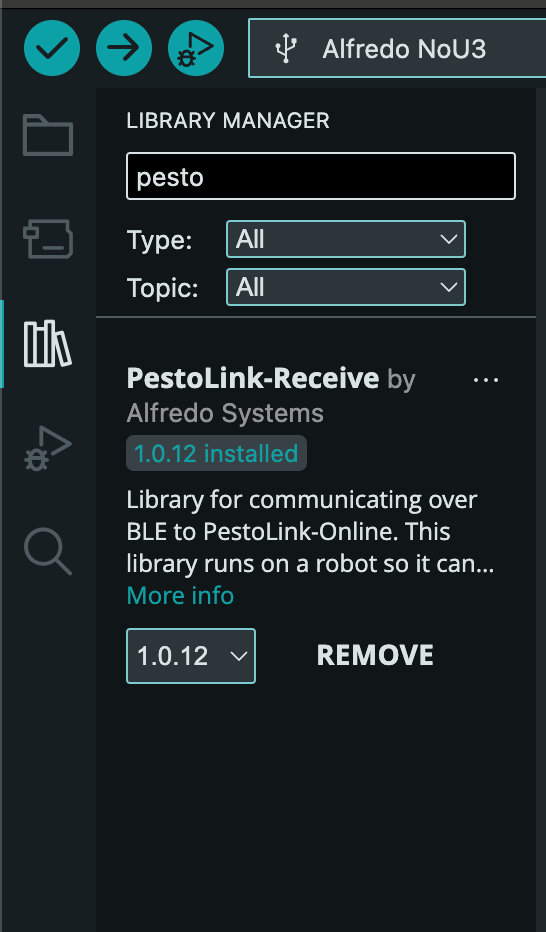
Install the PestoLink-Receive library from the Library Manager:
Upload this sketch:
#include <Alfredo_NoU3.h>
#include <PestoLink-Receive.h>

// Drives the robot from the PestoLink web app over Bluetooth.
// Works with a keyboard, a touchscreen, or any gamepad your laptop/phone sees.

NoU_Motor our_motor(1); // Motor port 1
NoU_Servo our_servo(1); // Servo port 1

void setup() {
  Serial.begin(115200);
  NoU3.begin();
  PestoLink.begin("MyRobot"); // your robot's Bluetooth name -- make it unique!
}

void loop() {
  if (PestoLink.isConnected()) {
    // Show your battery voltage in the PestoLink app.
    PestoLink.printBatteryVoltage(NoU3.getBatteryVoltage());

    // Gamepad: left stick Y axis. getAxis() returns -1.0 .. 1.0,
    // and up on the stick is negative, so flip it.
    float throttle = -PestoLink.getAxis(1);

    // Keyboard: W and S drive too.
    if (PestoLink.keyHeld(Key::W)) throttle = 1;
    if (PestoLink.keyHeld(Key::S)) throttle = -1;

    our_motor.set(throttle);

    // Servo: hold button 0 ("A" on most gamepads) for 180 deg,
    // release to return to 0 deg.
    our_servo.write(PestoLink.buttonHeld(0) ? 180 : 0);
  } else {
    // No connection: make sure nothing moves.
    our_motor.set(0);
  }

  delay(10);
}
Open pestol.ink on your phone or laptop, press CONNECT, and pick your robot — it's broadcasting over Bluetooth now. Push the left stick (or hold W) and the motor spins.
Option B: Connect an Xbox or Steam controller directly
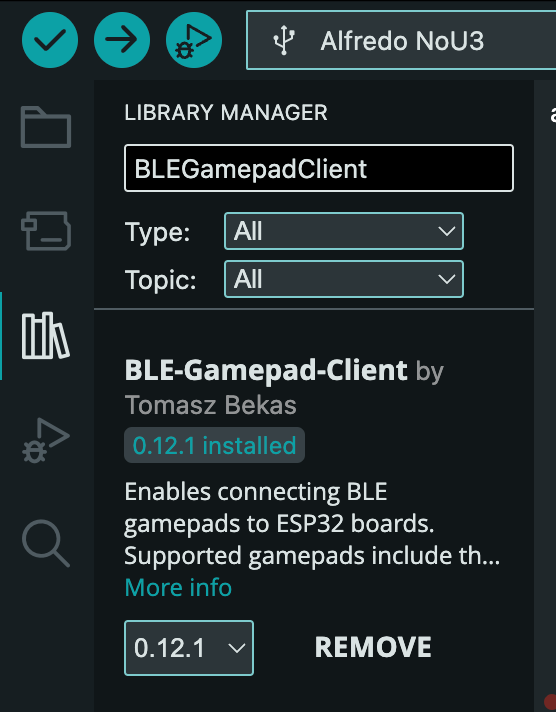
Install the BLEGamepadClient library from the Library Manager — it lets Bluetooth gamepads talk straight to the board:
Upload this sketch:
#include <Arduino.h>
#include <Alfredo_NoU3.h>
#include <BLEGamepadClient.h>

// Connects an Xbox Wireless Controller straight to the NoU3 over BLE
// (via BLE-Gamepad-Client / NimBLE) -- no laptop or phone in the loop.
XboxController controller;

// Same hardware as before: one motor on port 1, one servo on port 1.
NoU_Motor our_motor(1); // Motor port 1
NoU_Servo our_servo(1); // Servo port 1

void setup() {
  Serial.begin(115200);
  NoU3.begin();       // brings up motor driver + servos
  controller.begin(); // start scanning for / connecting to an Xbox controller
}

void loop() {
  if (controller.isConnected()) {
    XboxControlsState s;
    controller.read(&s);

    // Drive the motor from the left stick's Y axis (already -1.0 .. 1.0).
    // Up on the stick = positive = forward.
    our_motor.set(s.leftStickY);

    // Servo: hold A to go to 180 deg, release to return to 0 deg.
    our_servo.write(s.buttonA ? 180 : 0);
  } else {
    // No controller connected: make sure nothing moves.
    our_motor.set(0);
  }

  delay(10);
}
Put your controller in pairing mode (on an Xbox controller, hold the small pair button on top until the Xbox light flashes quickly) and it will connect to the robot on its own within a few seconds. The left stick drives the motor; hold A to swing the servo.
What you built
A robot you can actually drive: your code reads a controller and commands real hardware in a loop, dozens of times a second. Wire a second motor into M2, map it to the other stick, and you have a drivetrain. Ready for a full robot? Head to Building the Starter Bot.
Cover sources: NoU3 board diagram from the Alfredo NoU3 documentation, N20 product image from DFRobot, and SG90 product image from TowerPro. Images were resized and composited.